 Several years ago, I decided I wanted a hard floor on my wooden covered deck, one that would look more like an extra room, and less like a deck. I had my husband cover the deck floor which had been made out of 2x4s, with plywood, which I then covered with a peel ‘n stick tile. What a wrong thing to do! It didn’t take long for the rain to warp the underlayment and cause the tiles to pull up near the more open ends of the deck. I even had mushrooms growing in one area. So this year we removed the tile and underlayment only to realize that some of the 2x4s had rotted on the far end. We (I should say he) replaced about half of the 2x4s and after sanding and staining we had a new again deck. One interesting fact, 2x4s are not actually 2″ x 4″, but rather 1 1/2″ x 3 1/2″ and if you’re like me, you want to know why. This article tells it all. But what to do with sixteen 2x4x16′ boards?
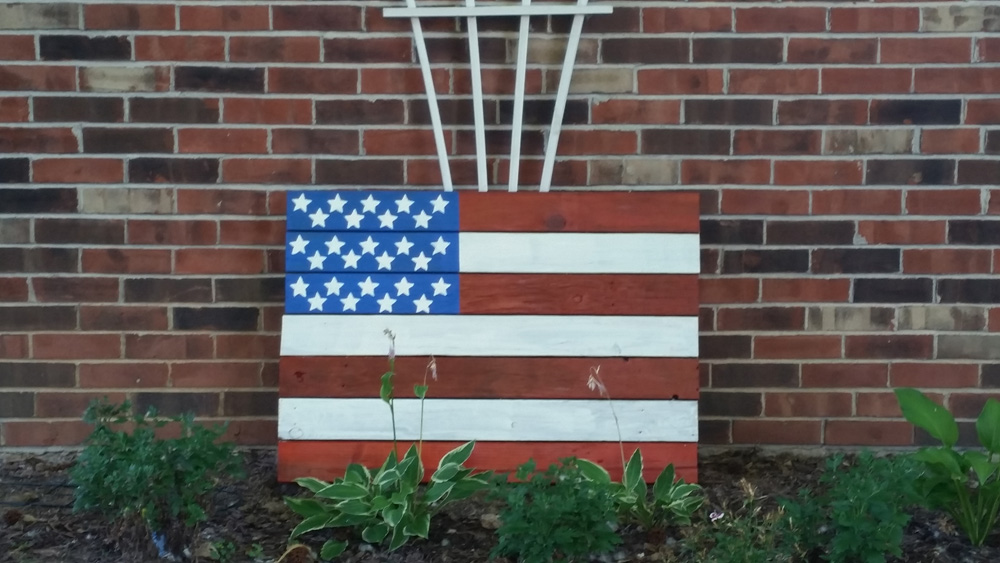
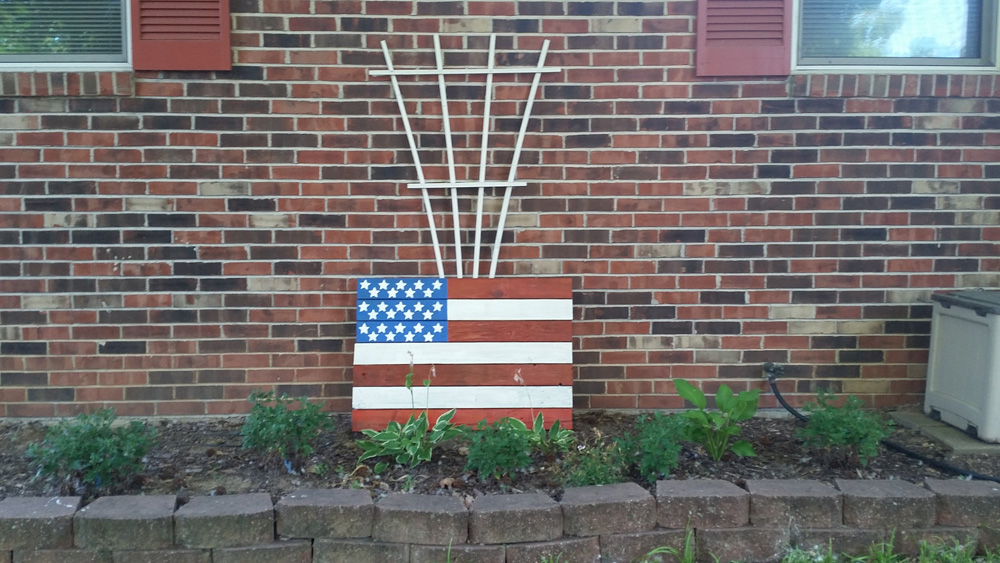
 It becomes project time. I’d seen a number of these wooden flags on the internet and most of them are made from wooden pallets. There was good and bad to building the flag with 2x4s, the bad side was that it was rather heavy, but the good side of that is, because it is heavy, it won’t blow away.
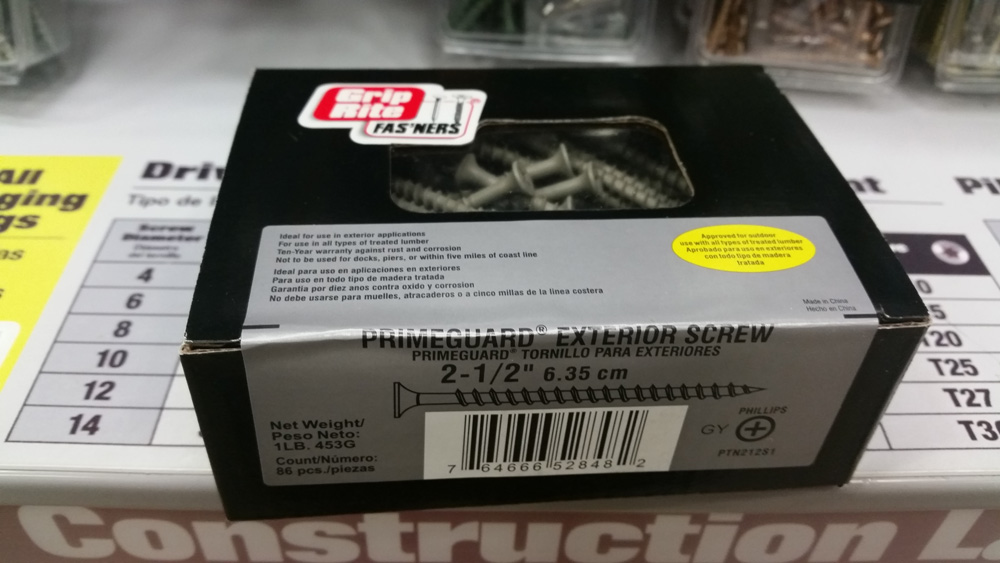
My original design was using 4′ lengths of board which I screwed together with boards on the back. I used 2 1/2″ screws (because I can’t hammer a nail straight).
 I placed nails between the boards to maintain an even spacing (as I’d seen my husband do) and then because I didn’t know how difficult it would be to drive the screw through the top board and into the bottom board, I decided I’d predrill holes for the screws. That, of course, created a different problem because somehow, those darn drill bits seem to get up and walk away on their own and the size I needed wasn’t in the case. So, new drill bits for me.
 I used seven 4′ boards because I wanted the stripes to go red, white, and end with red. After I’d put in all the screws and turned the board over, I decided that the length was too long for the three board 12″ blue star area I wanted, so back to the drawing board. I removed all the screws and cut the boards down to 3′.
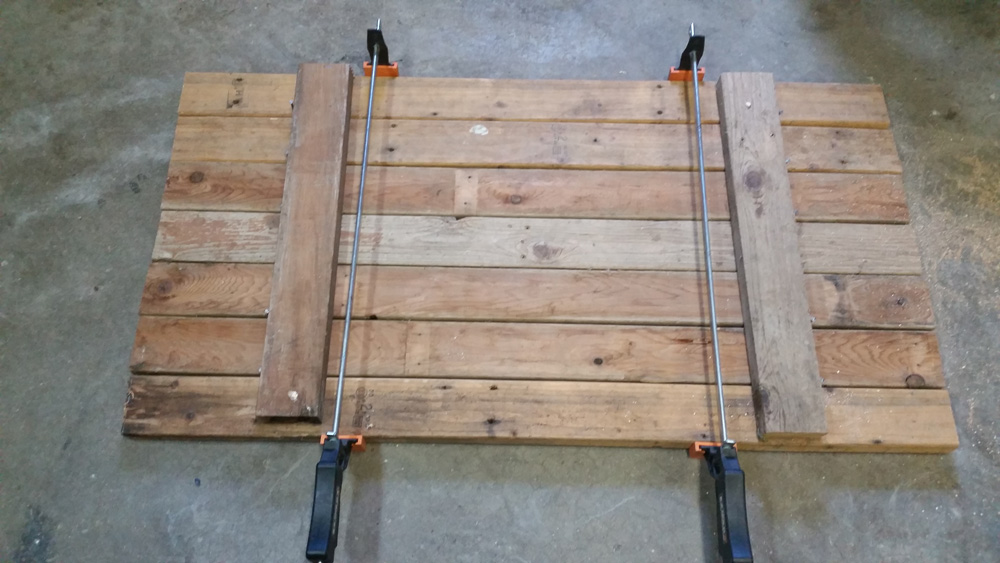 What made this entire project easier was the husband’s chop saw, which I had to unbury from beneath his overcrowded work room and cart upstairs to the garage. It was definitely worth the effort!
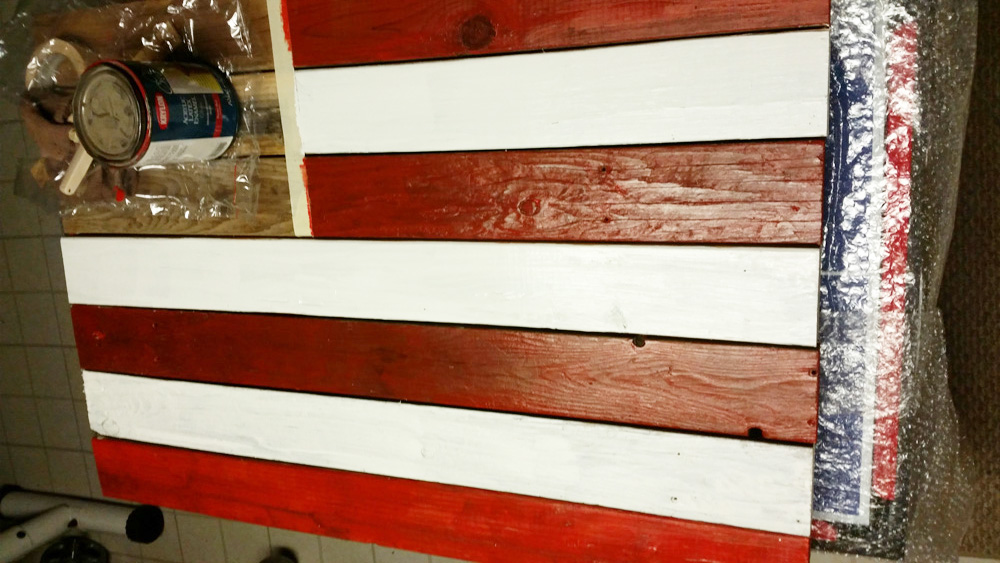
 Luckily, I had red and white paint and only had to buy blue paint which I bought from our local big box hardware store that sells small paint sample jars. I’d been working out in the garage because I knew there was no way I could find enough room in my husband’s work room to work with large length boards, but because our June weather here in Missouri has been unseasonably warm (okay, hot) and it was 95 degrees out, when it came time for painting, I transitioned to the basement.
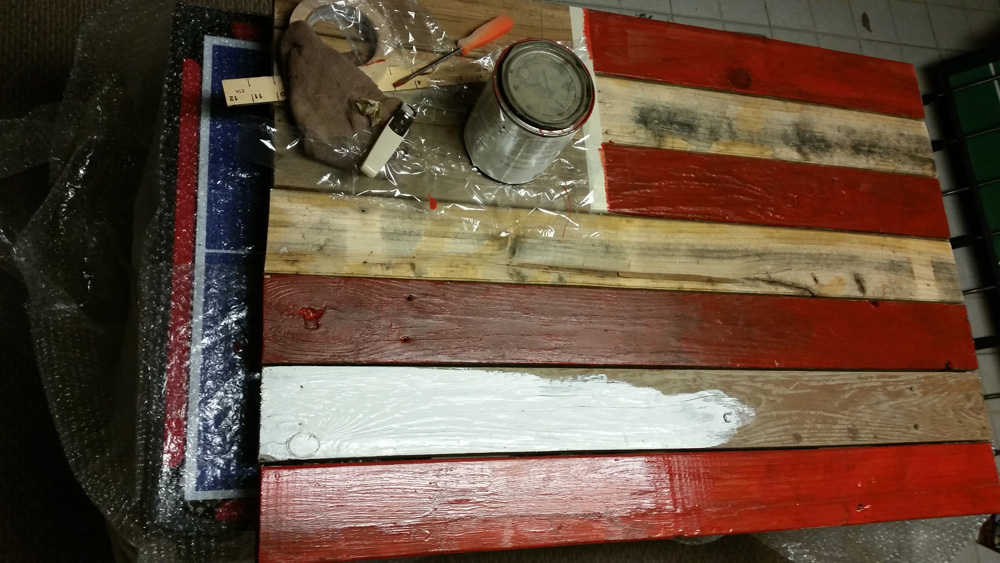 My original plan was to distress the wood after I painted it, but I realized that because the wood was already weathered and probably because my red paint was old, it went on exactly like I wanted it to look.
 The blue paint was next and then on to the stars. I was able to find a star template at Hobby Lobby and used that to first draw my stars and then watching my favorite reality show, I sat at my counter and painted the stars.
 Although the stars didn’t come out perfectly, I decided they would look fine (at a distance).
 So what will you need if you build this?
Wood, a saw, screws or nails, drill or hammer, furniture clamps (or something to hold the boards together while you put in the screws), paint and a little time. I bought screws, drill bits, paint and stencils, nothing that can’t be used again (as long as my drill bits don’t wander off again).
